
If your Hexoskin Device is not assigned to a user, you will not be able to make any recordings.
For researchers who are managing multiple user accounts, make sure to read this article -Managing Multiple Users for a Research Project.
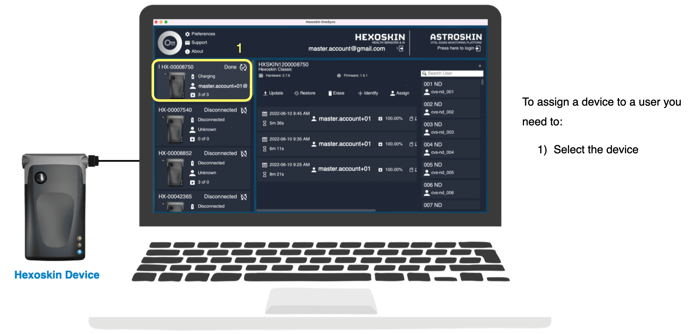
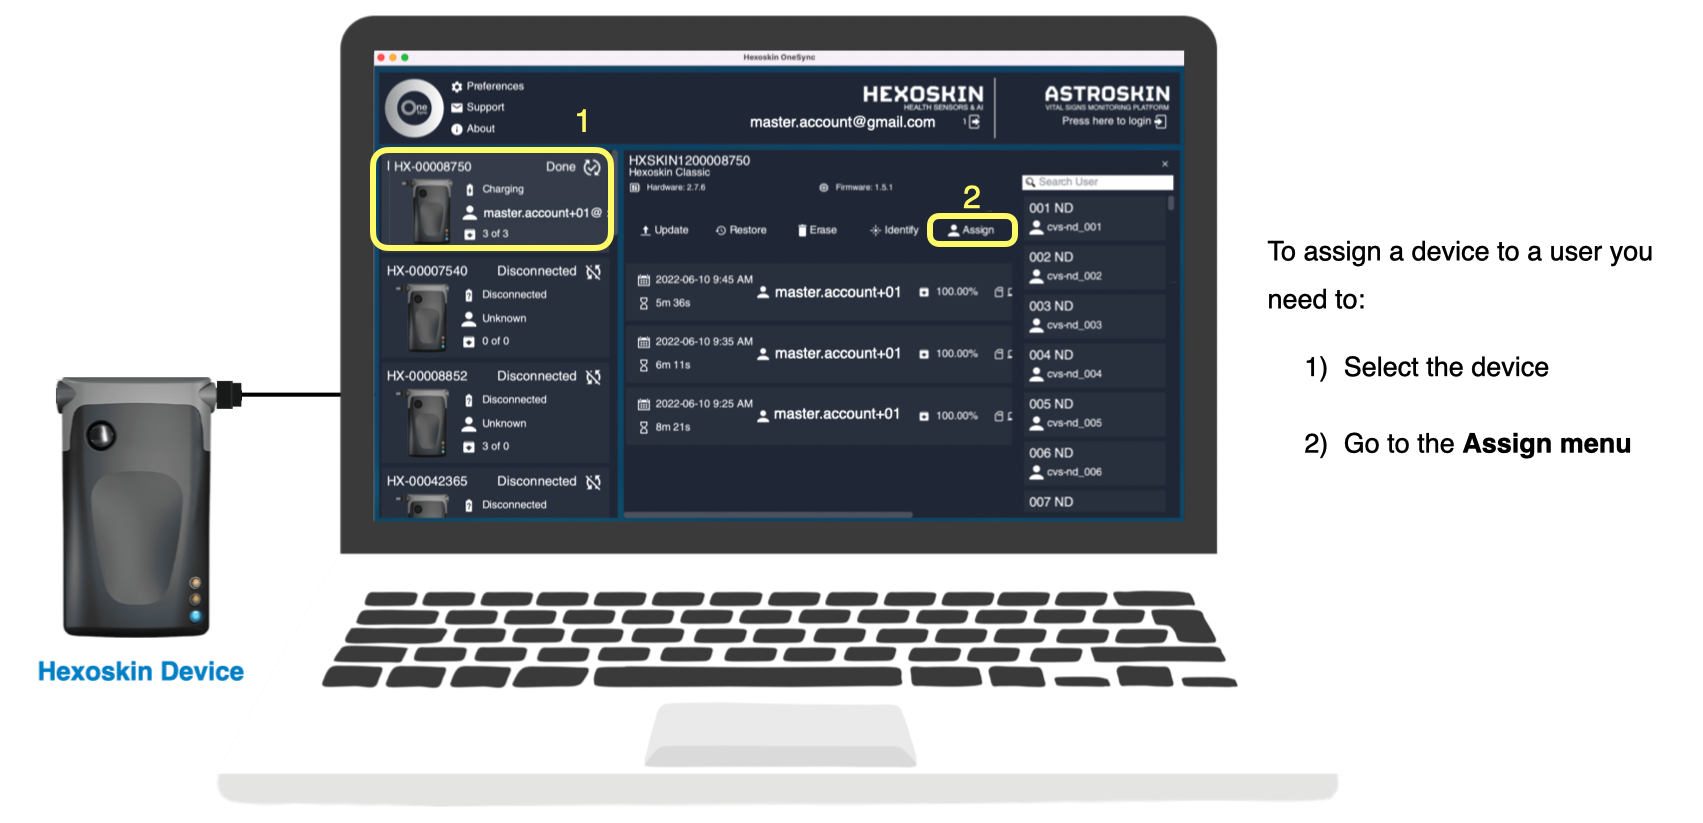
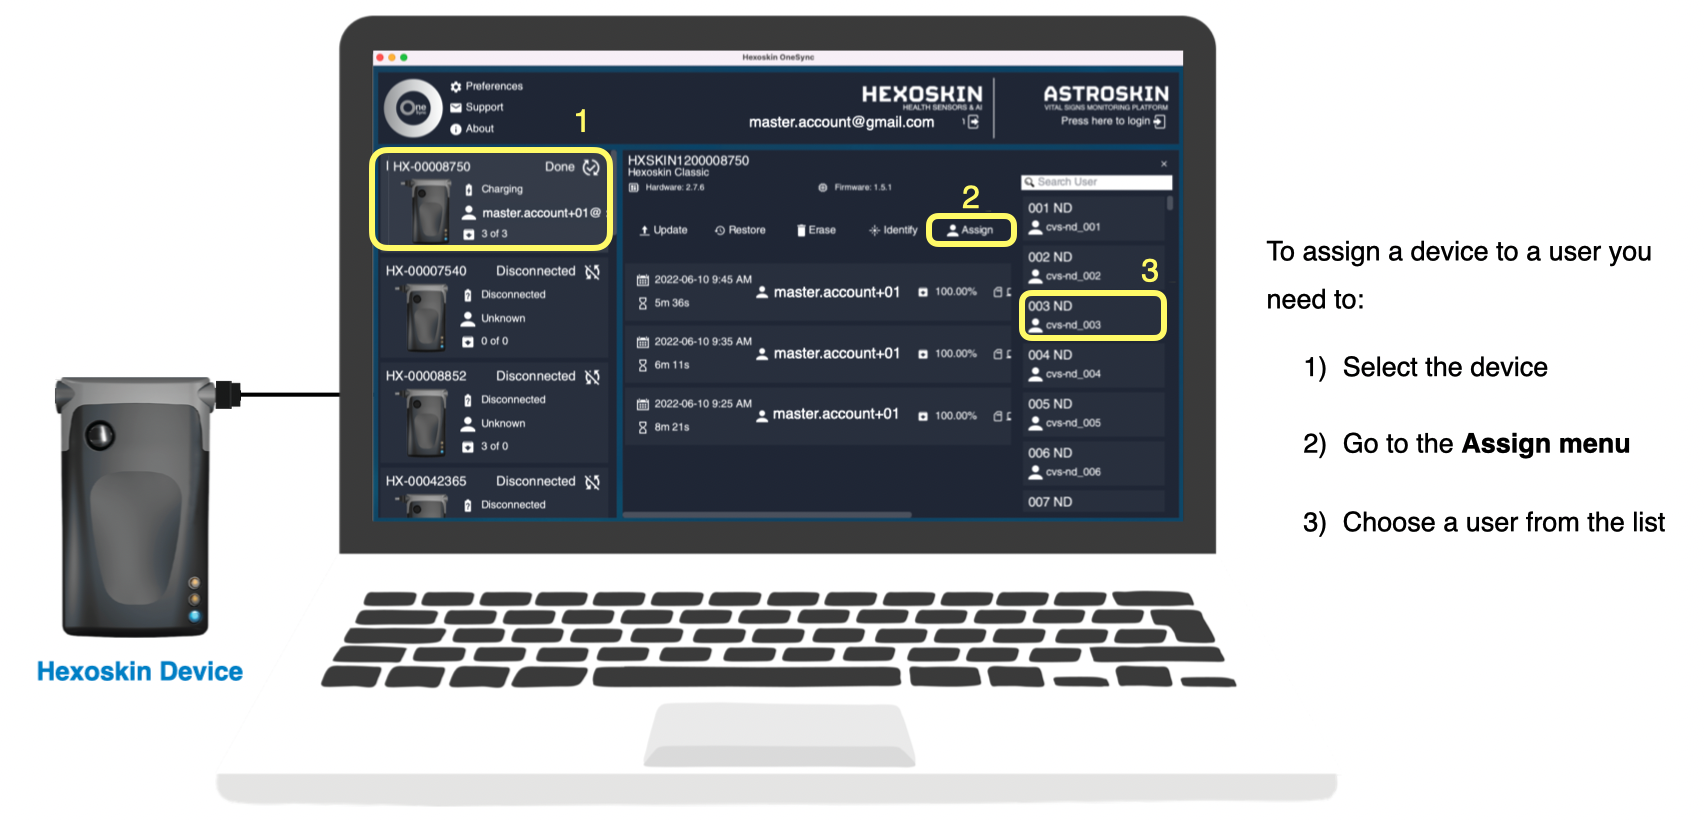
To assign the Hexoskin Device to a user, you need to:
1) Download Hexoskin OneSync. You can visit our "Downloads" page or use the direct download links provided here to do this. Please select the link that is compatible with your operating system, either MacOS or Windows.
2) Launch Hexoskin OneSync and Sign in with your Hexoskin Account.

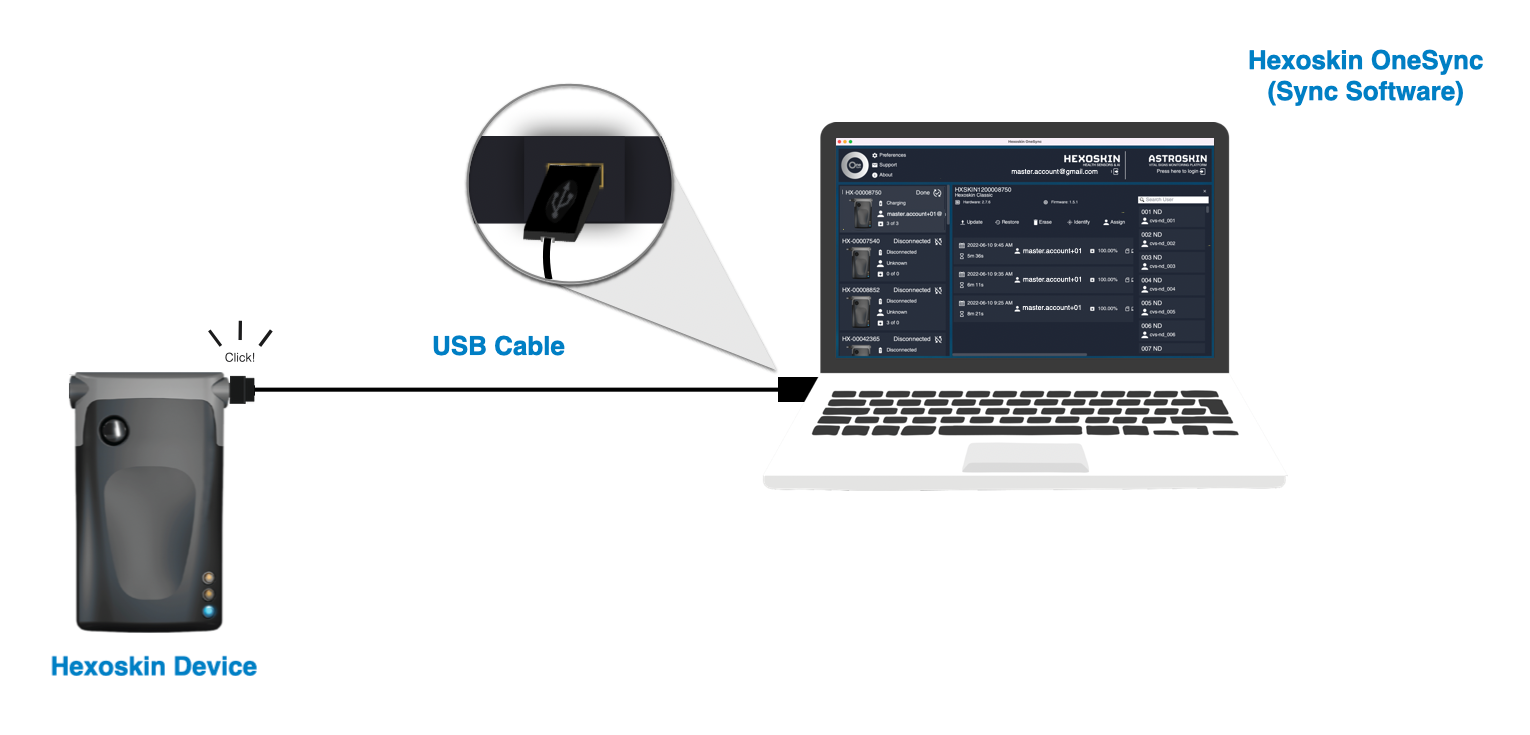
3) Connect your Hexoskin Device to your computer with the provided USB cable.
4) Select your Device. On the left side menu, click on the connected device.
5) Click on the "Assign" menu. On the right side, you'll then appear on your associated User's list.
6) Select the user's account of your choosing from the list (on the right side). Once this is done, Your device is now assigned to your account, and the user's account should now appear under your Device information left panel.
Note: You can assign multiple devices to the same account or multiple accounts to the same Device. However, keep in mind that only one user at a time can record with a Hexoskin Device.