
This feature will no longer be supported by the Hexoskin User Dashboard and will now be supported by Hexoskin OneView Dashboard in Fall 2025. Clients who have not migrated to Hexoskin OneView can reach out to sales@hexoskin.com for a demonstration or to get a quotation.
In some cases, you will want to have access to the data of multiple Hexoskin users. These can be athletes that you coach, research subjects, friends, family, etc.
You can create an admin/user relationship between your account and the accounts of the people whose data you want to have access to.
On this page, you will learn how to:
- Create one admin account and separate user accounts
- Assign a user account to a device
We strongly recommend that you create a separate Hexoskin account for each user to ensure there is no overlap in the different recordings. In addition to this, some metrics like energy expenditure use the account’s profile information (age, height, weight) so it is not a good idea to share accounts.
Create your personal Admin email account
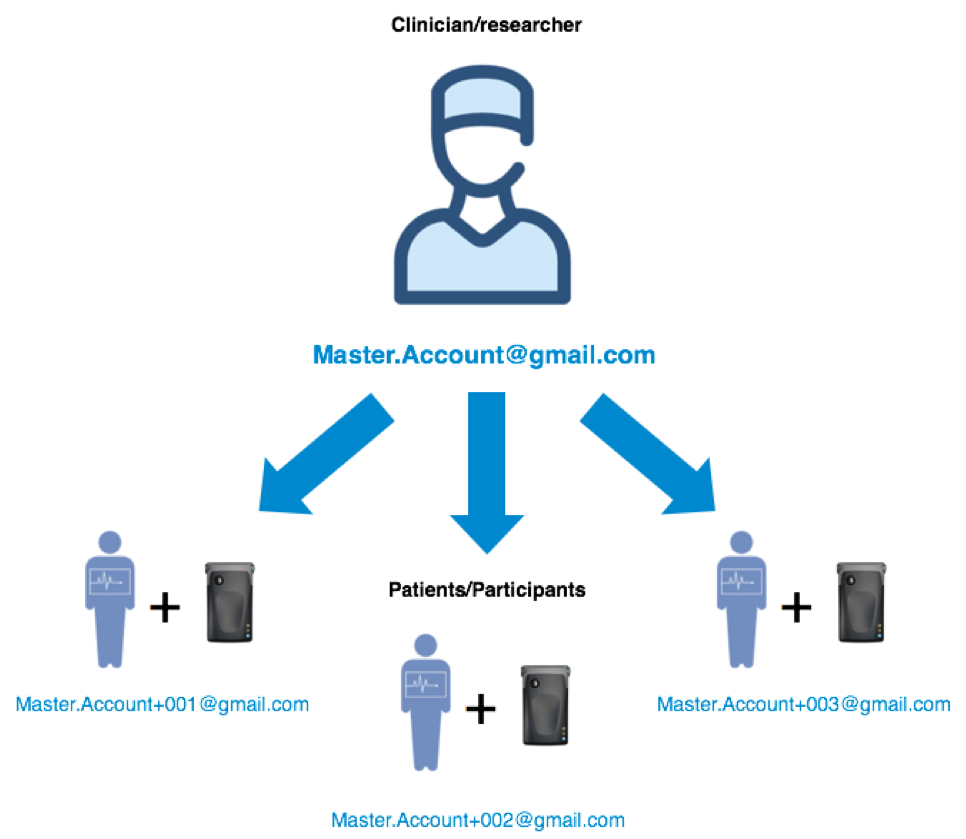
We recommend you create your Admin email account (example: master.account@gmail.com) using Google Gmail which allows the creation of alias email addresses for your users (example: master.account+001@gmail.com, master.account+002@gmail.com, and so on).
The interesting thing about Google's email accounts is that anything beyond the '+' sign is ignored by Gmail, this means all confirmation emails will be sent to your own Admin account (master.account@gmail.com) and you will be able to confirm the new accounts and get set up much faster than if you had to wait for each user to confirm their subscription.
Please note that these alias email addresses are not to be created on Google Gmail directly. See below for the detailed steps.
Create your Admin Hexoskin account
Now that you have determined or created your unique Gmail account, it's time to create your Admin Hexoskin account with the help of the Hexoskin Dashboard. To do this, simply:
1. Go to my.hexoskin.com
2. Select "sign up"
3. As a username, input your new Gmail address.
4. Fill in all other information fields.
5. An activation link will be sent to your email, this is required to activate your account.
Create your users’ accounts
In a research setting, you want to avoid waiting for each of your users to confirm their account and finish their subscription. By creating the users' accounts yourself, you will be able to manage all the accounts and you will receive all the confirmation emails in your own admin email account inbox and will be able to finish the setup for all your users' accounts in no time.
1. Log in to the Hexoskin Dashboard at my.hexoskin.com with your Admin account.
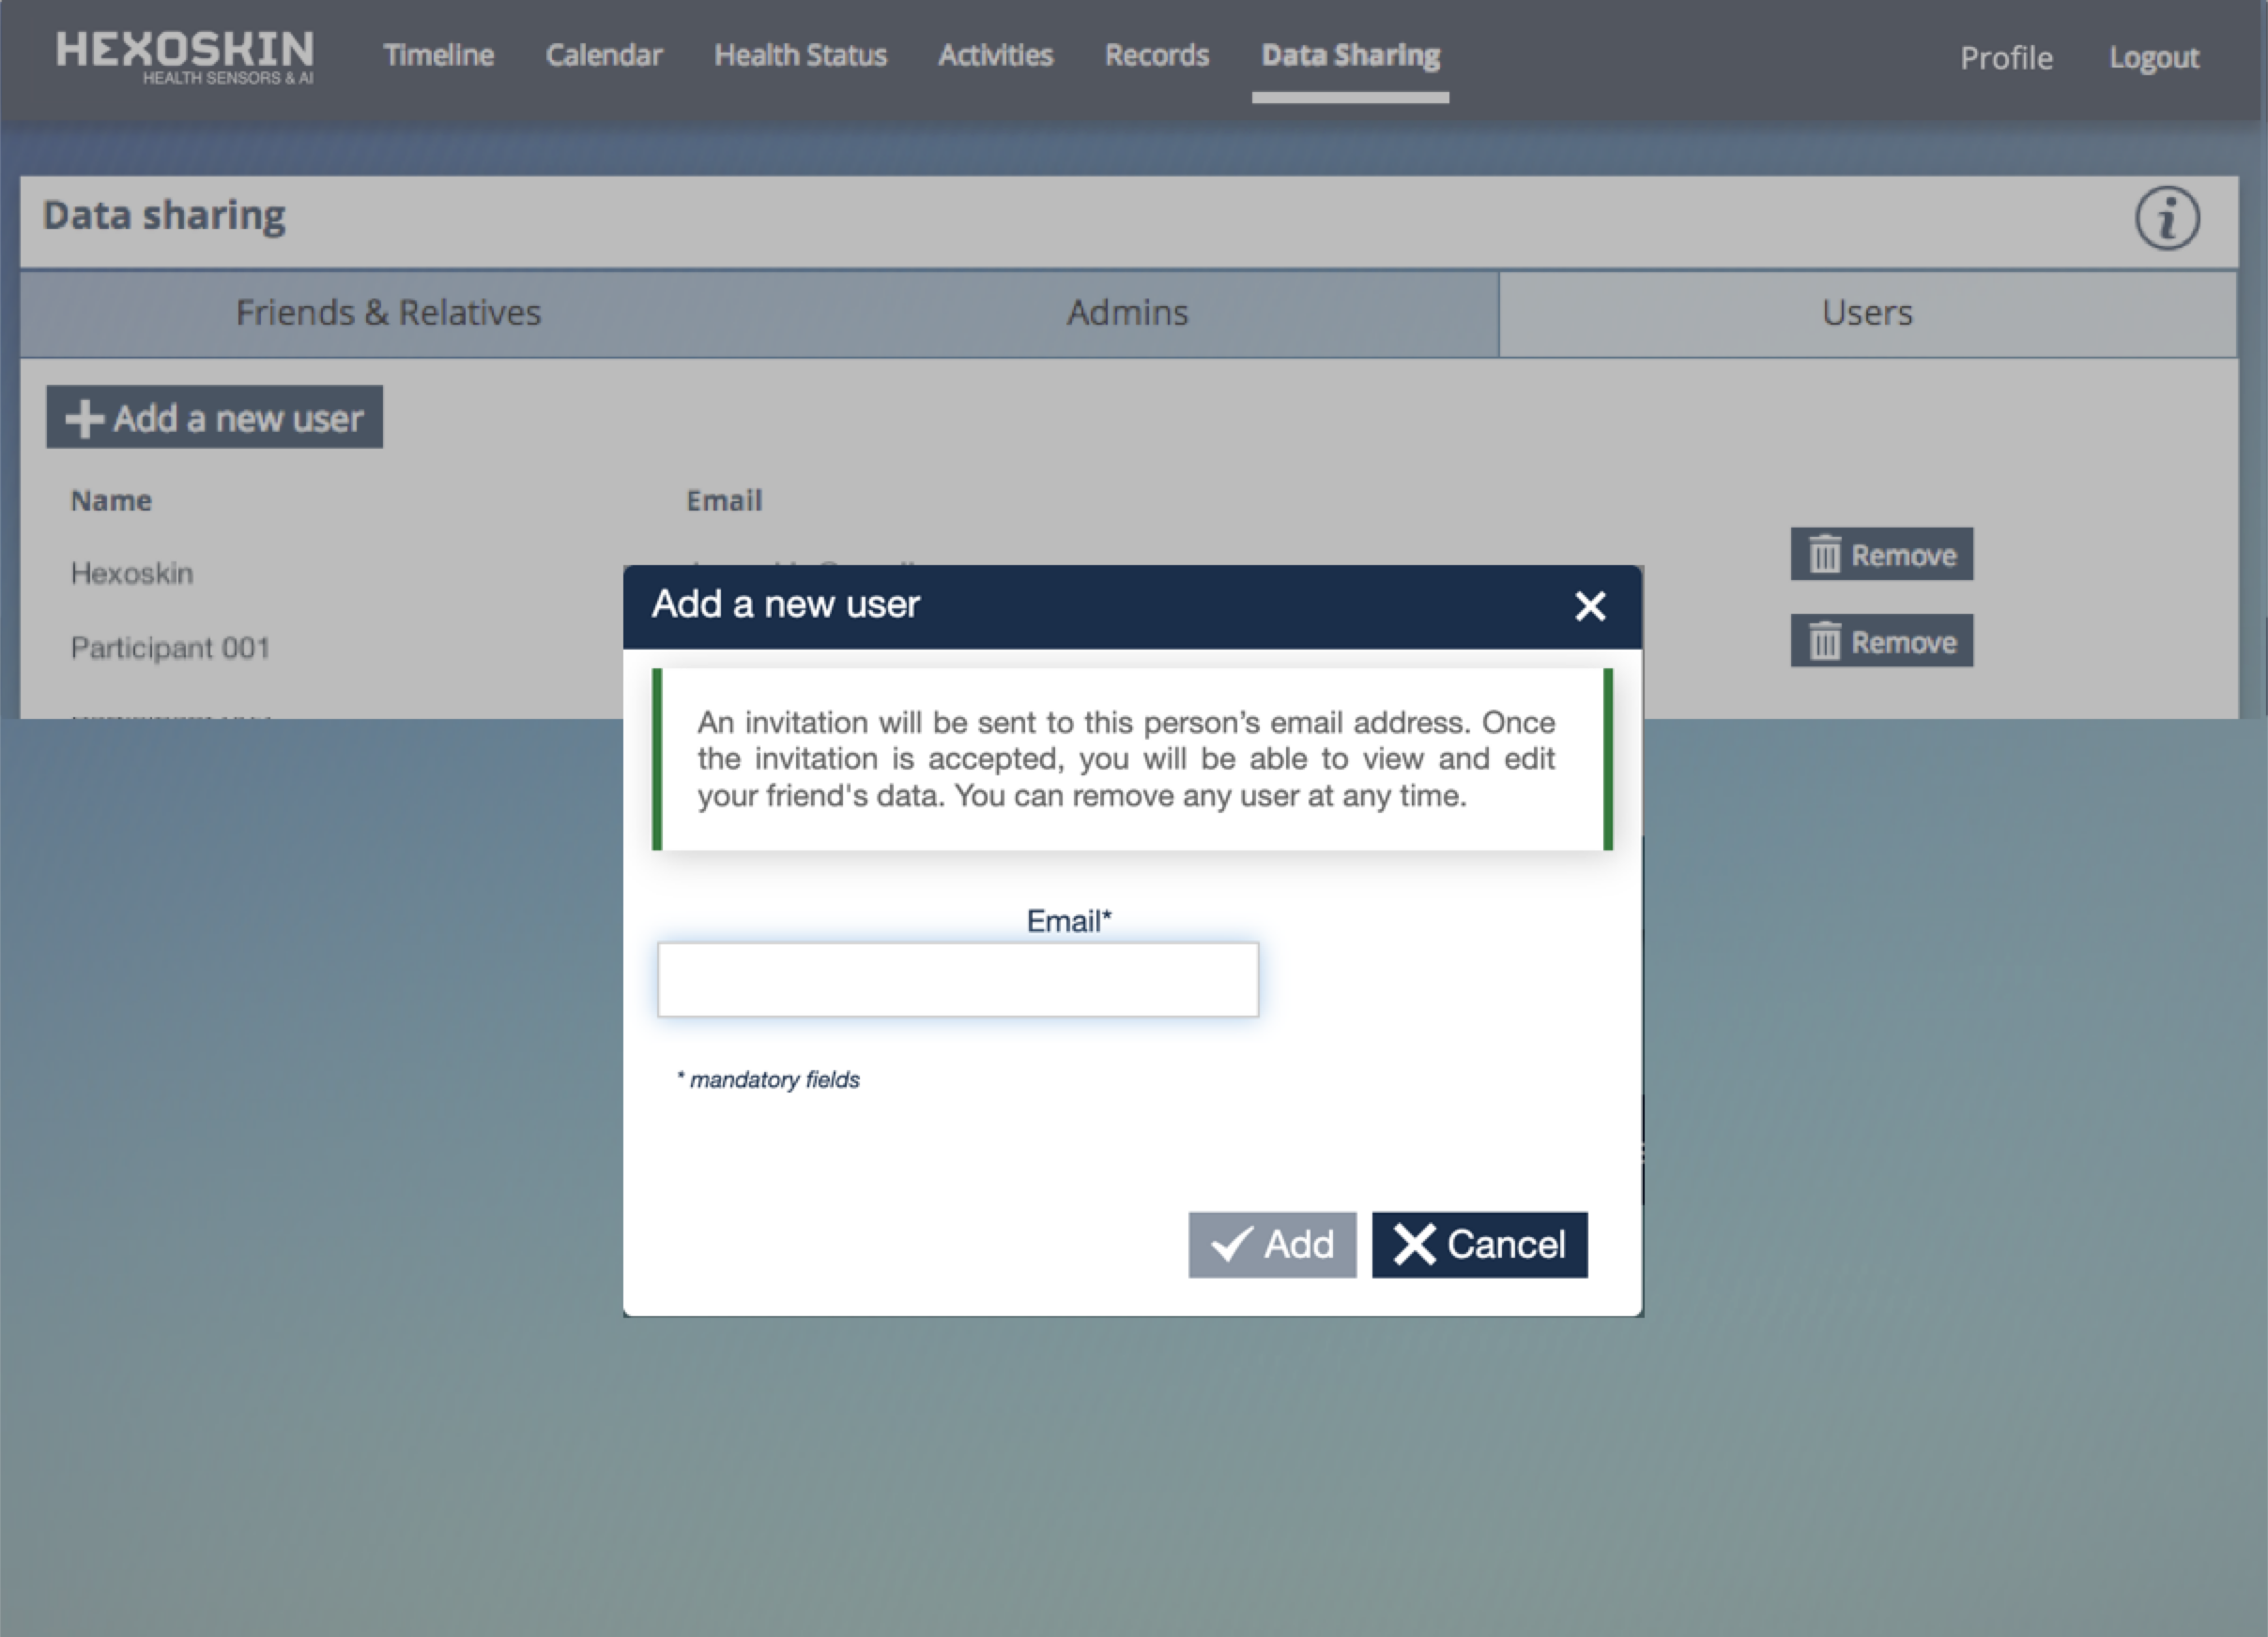
2. Go to the "Data Sharing" tab
3. Select the box "Users"
4. Click on "+ Add a new user"
5. Type their email address (root of admin email + suffix)*
6. Then, click on "Add".
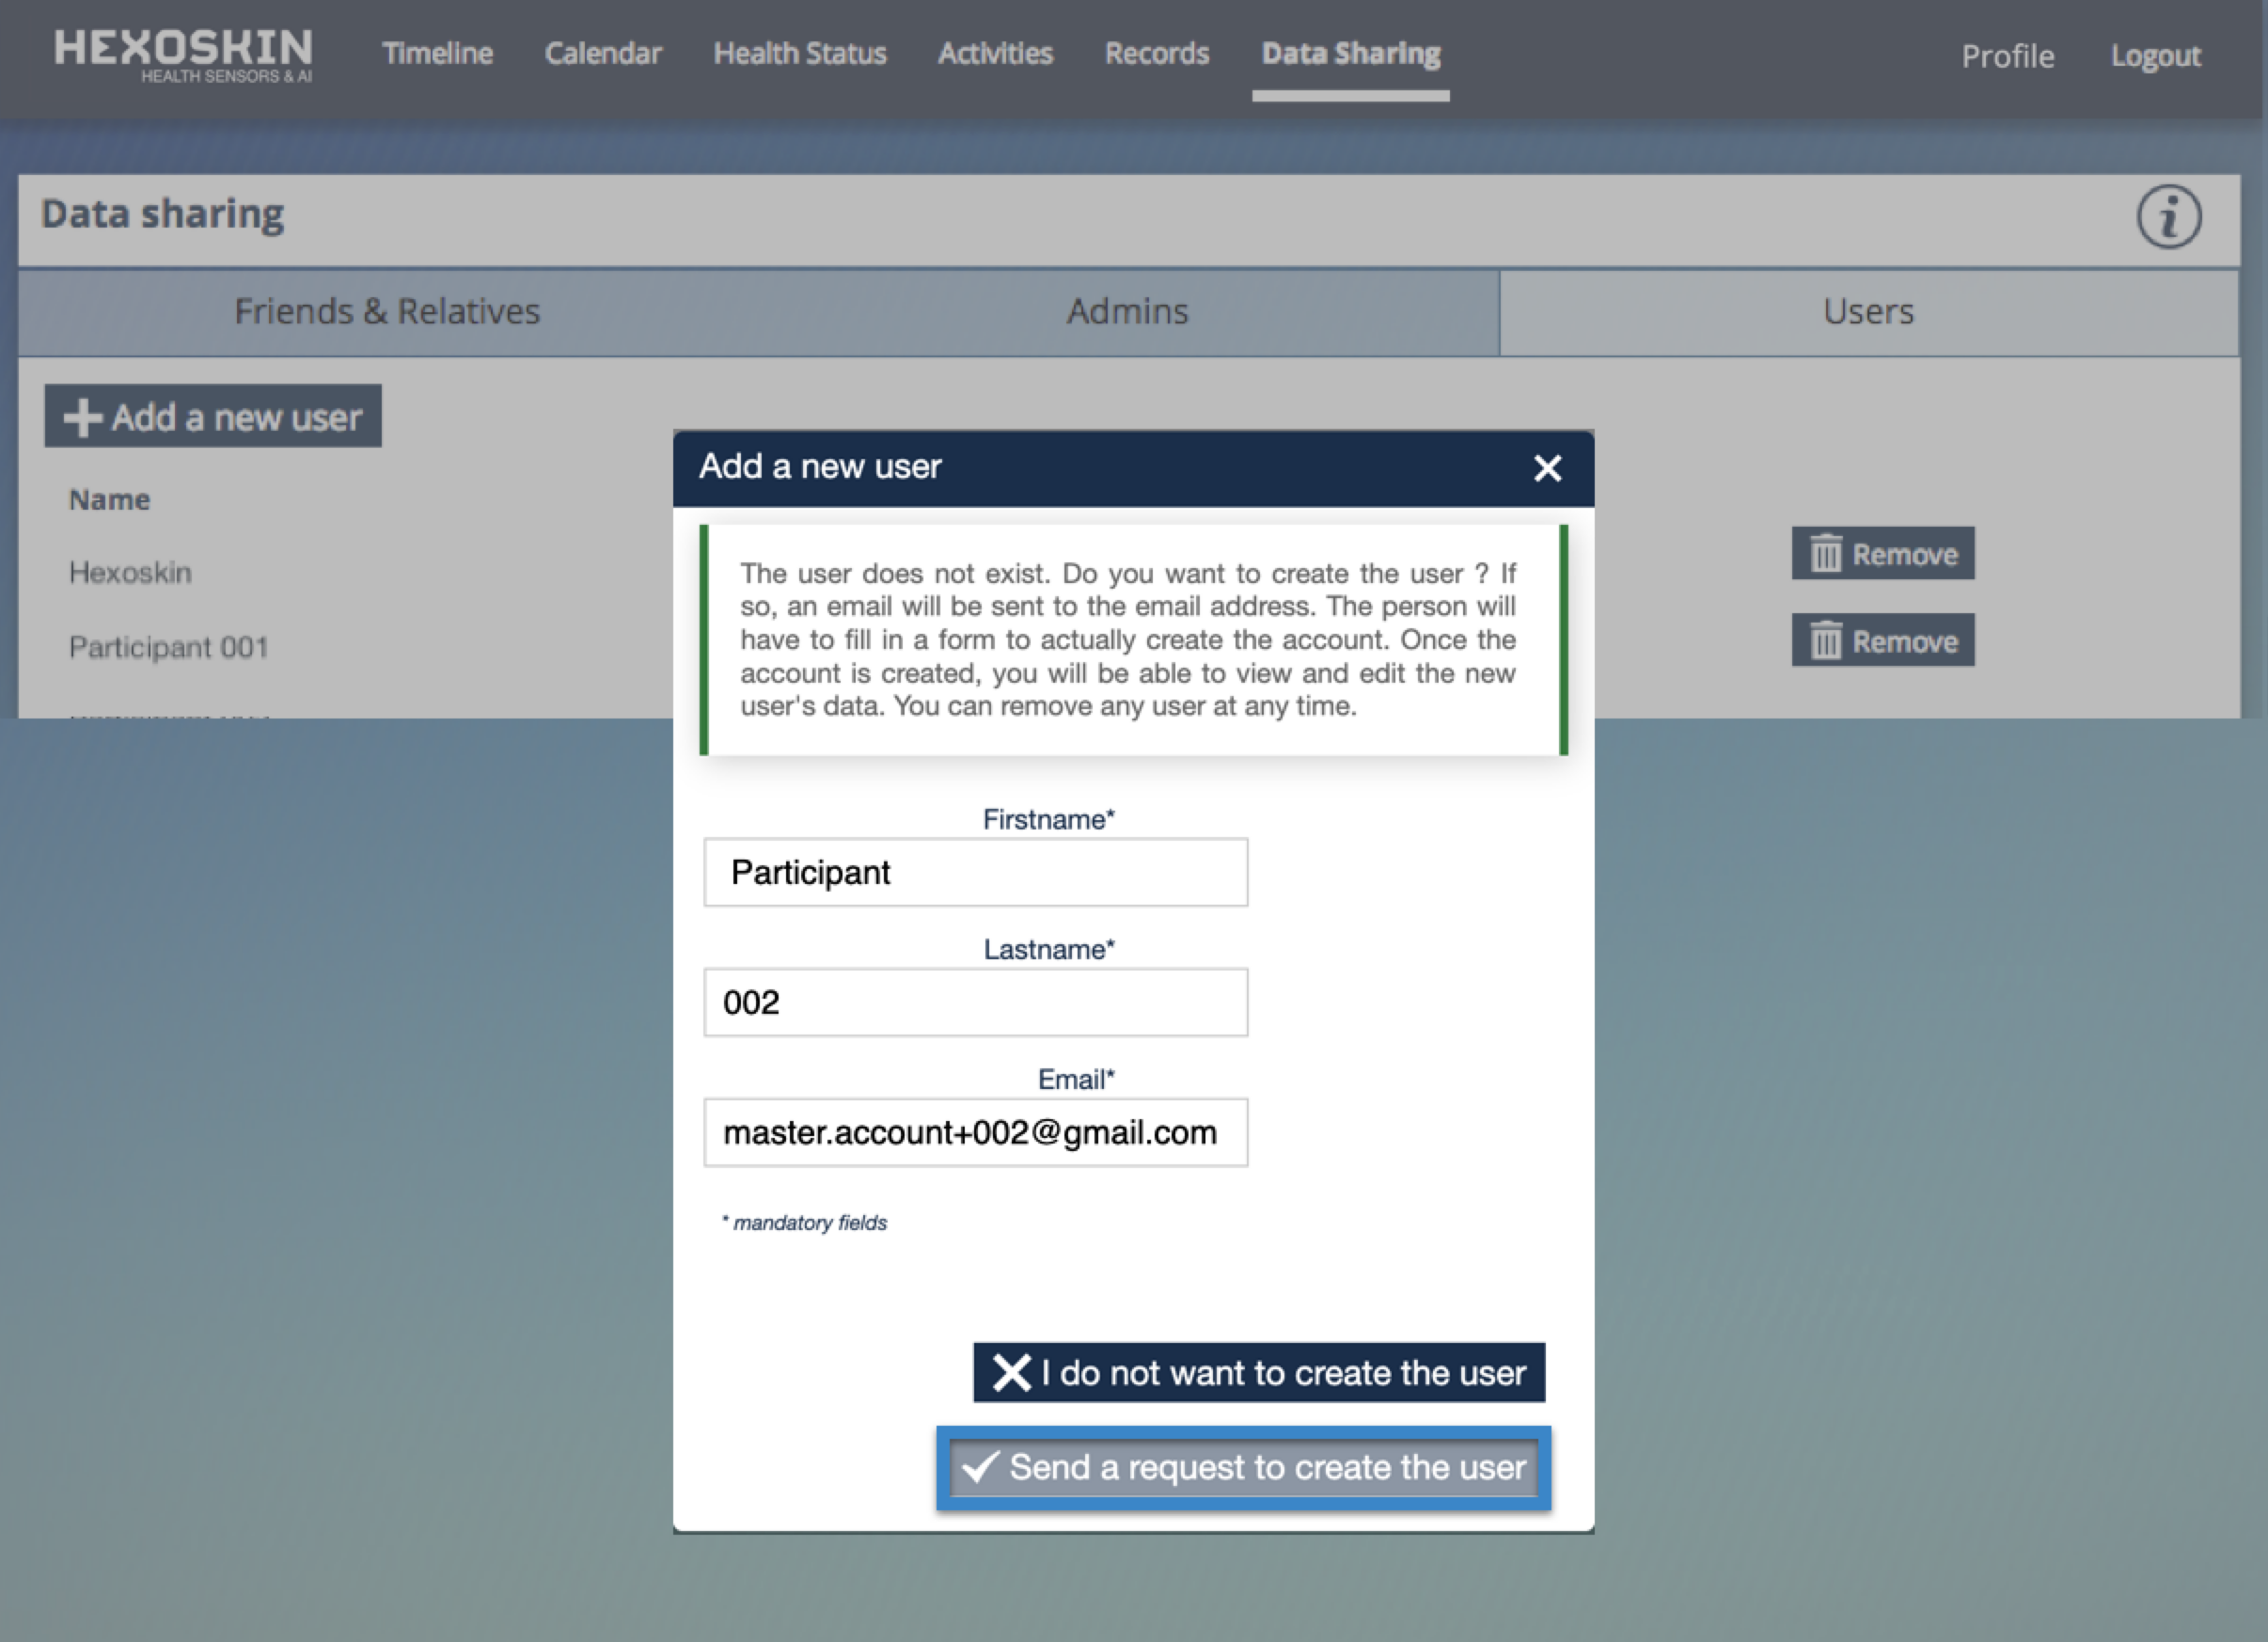
6. A new window will pop up to ask you to enter the user's first and last name.**
7. Then, click on "Send a request to create the user". Each time you create a new user, an email will be sent to the given email address for confirmation and password creation. In this case, the confirmation email will be redirected to the admin email account that you had created.
8. Log in to your Gmail inbox (of the admin account) and open the invitation sent by Hexoskin "Hexoskin account creation".
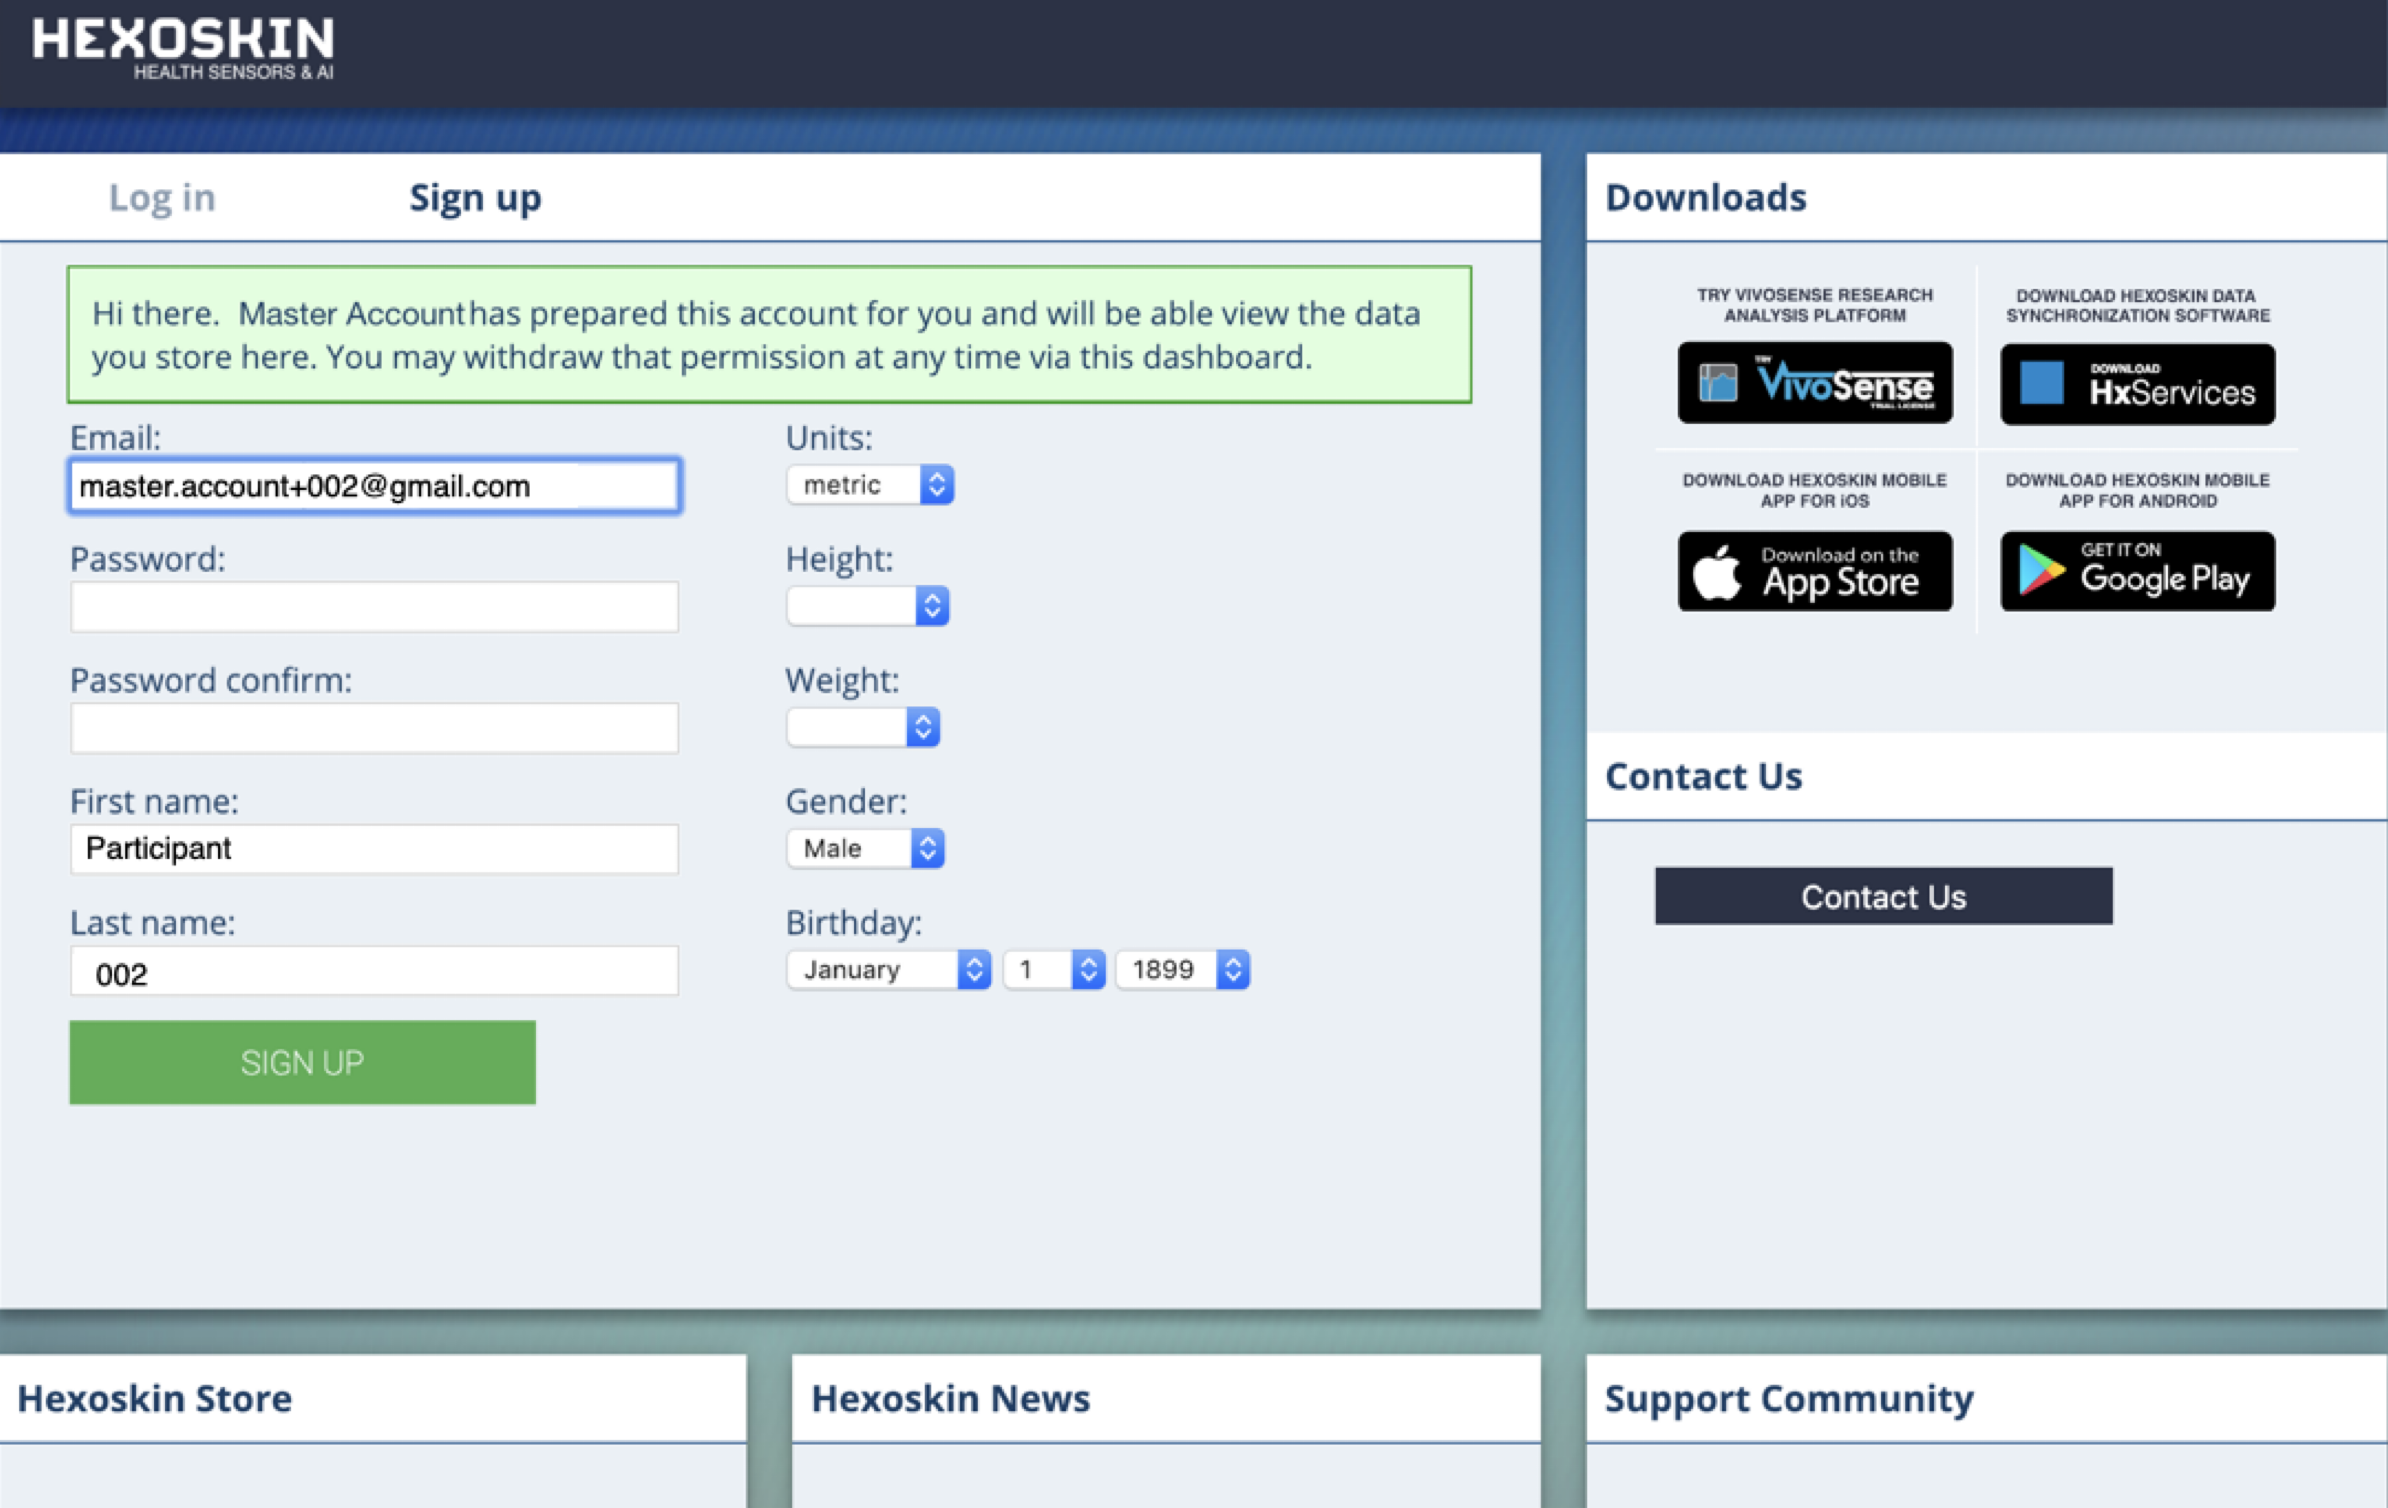
9. Click on the link and complete the form for the account setup ***.
10. Click on "Sign up" to complete the user's account creation.
*Note: This is where alias email addresses are being used. For example, if you are to create an account for participant #002 for your study, you would need to type in "master.account+002@gmail.com", for example.
**Note: This is where you can anonymize the users' accounts. In a research setting, in order to respect participant privacy and confidentiality of your participant, instead of capturing the user's first and last name, you can use "Participant" as the first name and "002" (participant's study number) as the last name, for example. This way your participant's data will remain anonymized. You can use any pseudonym as you see fit or you can also use the user's initials. This depends on the guidelines and regulations of your institutional review board (IRB).
***Note: Don’t forget to fill up each user’s profile (age, weight, height, gender) to ensure that the metrics are correctly calculated. The complete date of birth (DOB) is not required; simply the year of birth would suffice. The month of birth can be entered if you feel that this information would not reveal the participant's identity. Hexoskin advises against capturing the day of birth on its platform.
Install and run Hexoskin OneSync syncing software
Hexoskin OneSync is the free desktop syncing software that allows you to upload the raw data from your Hexoskin Devices to your web Dashboard in the cloud. It also allows you to assign a given user to a device which is useful if multiple users are sharing devices. If you haven’t done so already, head to our Downloads page and install the latest version of our data-syncing software for Windows or Mac OSX.
Plug one of your Hexoskin Devices into your computer.
1. Launch Hexoskin OneSync.
2. Log in with your Admin account.
3. Connect a device to the computer with the USB cable provided.
4. Click on Assign. You now see the connected device in the left panel and all your users in the right panel. To assign a user to the device, all you have to do is click on the user (in the right panel). The name of the selected user should appear under the device number, confirming that all data will be recorded by this device under this user's account.
5. You can now unplug the device from your computer and start recording data with it. In case you want to switch users, follow the same steps and reassign a different user to the device.
To sync all of your users’ data, you need to be logged into OneSync with your Admin account.
Go further and faster with your study and participants' management with Hexoskin OneView
The new Hexoskin OneView dashboard is an all-in-one solution for streamlined data monitoring of digital endpoints and biomarkers. OneView expands possibilities for Hexoskin sensors in professional projects, research, and clinical studies.
Experience new advanced features for managing and reporting small to large-scale remote health monitoring projects in one secure dashboard. Streamline team management, customize research protocols, simplify participant management, monitor compliance, collect valuable data through surveys, and access a variety of reports for further analysis.
Reach out to our Sales Team to request a Demo and a Quote.
