Installing Hexoskin Drivers for Windows
This article explains how to install the Hexoskin Drivers for Windows to solve issues that might occur depending on your Windows machine.
If your organization has security measures in place and you are using Hexoskin OneSync, we recommend consulting your IT department for assistance with installing the drivers. Admin rights are usually required to make these changes.
If you've run into an issue where your Hexoskin Smart Device is not appearing in OneSync or your computer is not recognizing that a device was connected, this may be related to the Hexoskin drivers not being installed correctly. No need to worry, this can easily be fixed by installing the drivers manually.
Please make sure to close OneSync before beginning this process and make sure it is not running in the background or simply minimized to the task tray.
Install the Drivers
- Download the drivers.
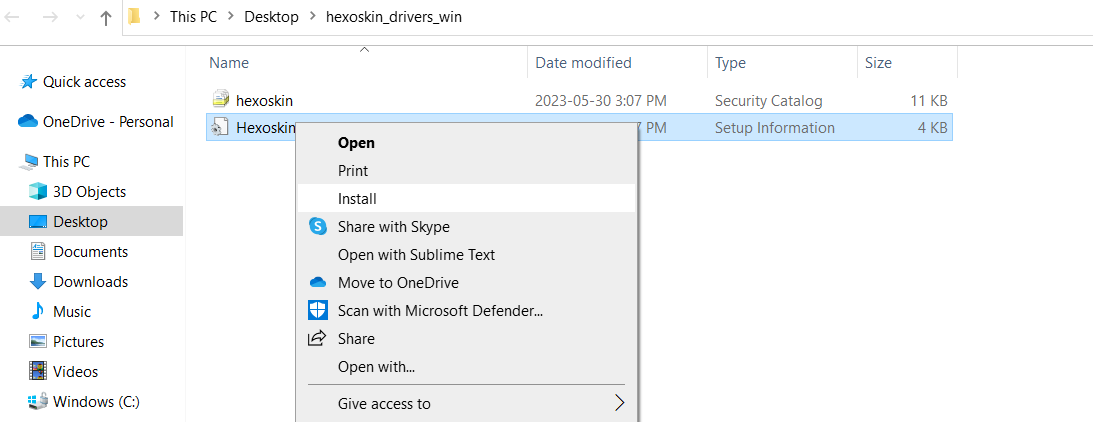
- Open the downloaded .zip folder and extract the 2 Hexoskin files to the Desktop.

- Once extracted, locate and right-click on the Hexoskin INF file (Setup information), then select "Install."

- The drivers have now been installed.
If you do not see the "Install" option when right-clicking on the .inf file, please ensure that you have successfully extracted the files from the downloaded folder.
It is always good practice to Reboot your PC after installing new drivers. Once you've completed these steps, you can resume using your Hexoskin as intended.
If the issue persists, please contact our Support Team.