Thank you for your Hexoskin order and welcome!
1. Before Starting
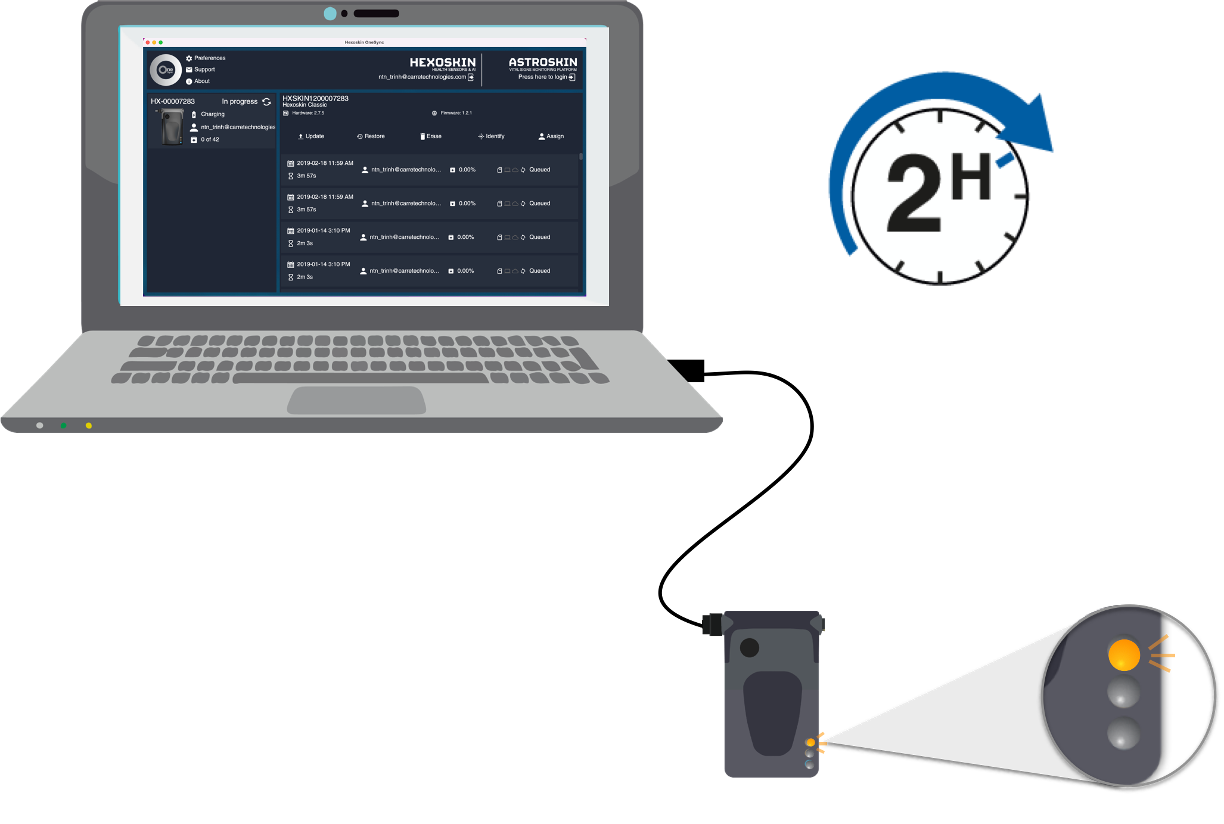
Before you begin using your Hexoskin, it's necessary to charge the Hexoskin Device. Use the provided USB cable to connect it to your computer or laptop (do not use a USB hub). The Device's battery will take approximately 2 hours to reach a full charge.
2. Hexoskin Account
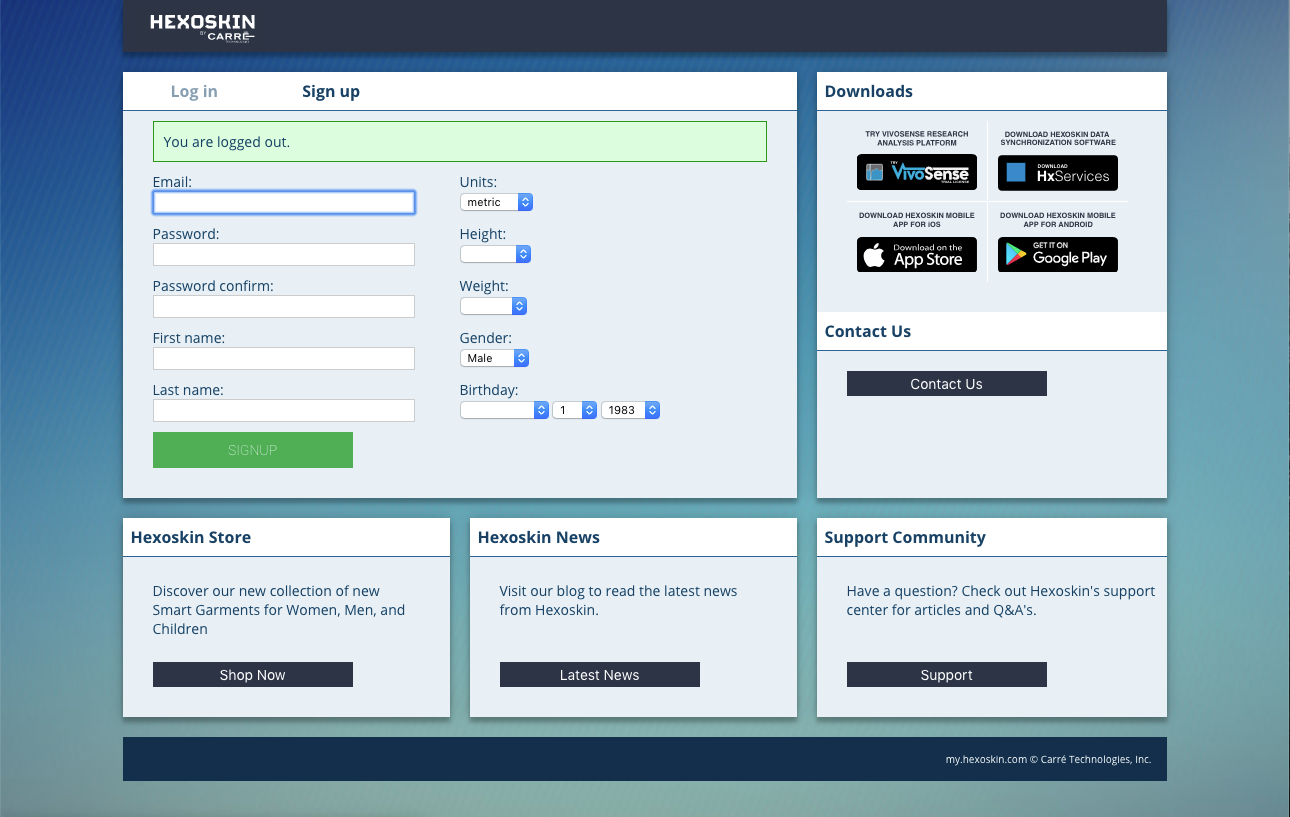
Create your Hexoskin account. Please make sure that the demographic information that you input is accurate. Your profile information (i.e. sex, date of birth, height and weight) will be used by the Hexoskin algorithms to calculate your personalized Hexoskin metrics. Your account will allow you to register your Device, and record and synchronize your data. You can create your Hexoskin Account either with a web browser or in the Hexoskin App.
3. Assign your Device to your Hexoskin account. To do this, you need to:
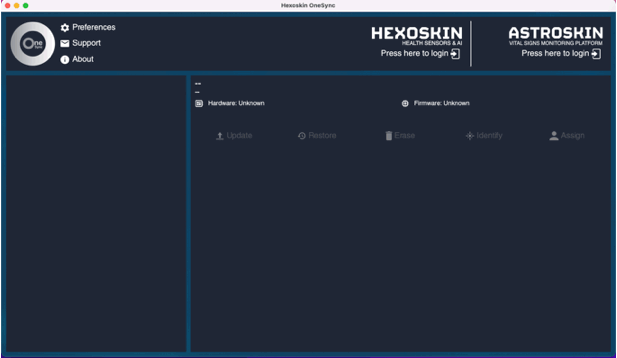
- Download Hexoskin OneSync (Hexoskin OneSync for MacOs or Hexoskin OneSync for Windows)
- Launch Hexoskin OneSync
- Sign in with your Hexoskin Account
- Connect your Hexoskin Device to your computer with the provided USB cable
- Select your Device
- Click on the "Assign" menu
- Select the user's account of your choosing from the list (on the right side)
If you run into an issue on a Windows computer where the OneSync software does not recognize that your SmartDevice is connected to the computer, please follow the instructions article before proceeding: Installing the Hexoskin Drivers
Your Device is now assigned to your account, and the user's account should now appear under your Device information left panel. You can assign multiple Devices to the same account or multiple accounts to the same Device (for more information, please refer to this link). Keep in mind that only one user at a time can record with a Hexoskin Device.
4. Mobile App (Android & iOS)
If you wish to use the Hexoskin App, you need to download the Hexoskin App from the Apple App Store or Google Play Store. Make sure that your Hexoskin Device is not currently recording (not connected to the shirt, the 2nd orange LED should be off) or syncing a session (not connected to a computer)
Then, go to Settings > Bluetooth on your phone or tablet. Make sure that the Bluetooth is turned on.
To connect your Hexoskin recording Device with your phone or tablet, you can complete the process in a single step using the Hexoskin mobile app. Follow these steps to pair with an:
5. Put on your Hexoskin Shirt. To do this, you need to:
- Fold up the lower part of your Shirt.
- Put one arm through in the arm opening, then the head through the collar and finally the other arm in the other arm opening.
- Fold down the Shirt over your lower body.
Tip: It will be easier to put on and take off your Shirt if you remove your glasses and/or hair accessories.
Applying cream to the cardiac sensors of your Shirt
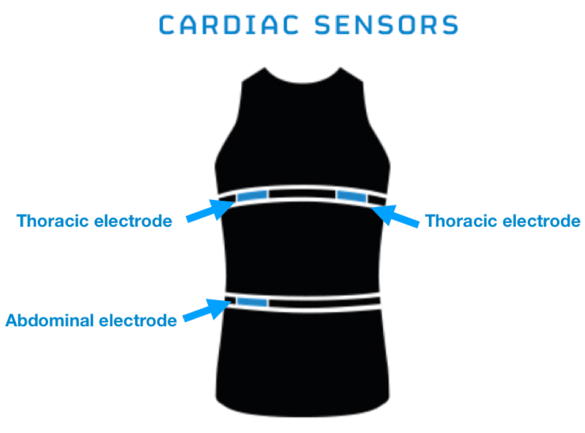
- Roll up the lower part of the Shirt to expose the abdominal cardiac sensor or electrode (bronze patch).
- Apply a nickel-sized amount of your glycerin-based cream to the abdominal cardiac sensor. Do not rub the cream in the fabric.
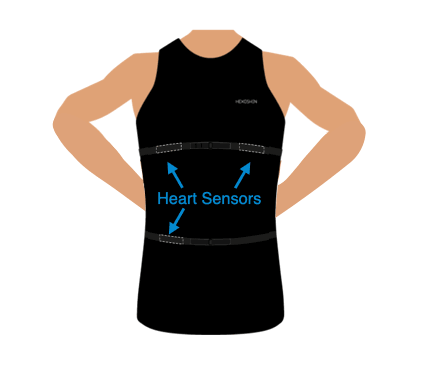
- Roll the lower part of the Shirt back down.
- For the thoracic cardiac sensors, gently stretch the armpit opening on the right side of your Shirt until you can see one of the thoracic cardiac sensors.
- Apply a nickel-sized amount of your glycerin-based cream to the cardiac sensor. Again, do not rub the cream in the fabric.
- Repeat steps 5 and 6 for the other thoracic cardiac sensor.
- Fasten the elastic belts.
* Note: If you are using water instead of cream, you might have to re-moisten the cardiac sensors more frequently (every ~ 1-2 hours) than if you are using cream (every ~ 24 hours or whenever you take off your shirt and put it back on). However, your sweat can replace the water if you perform intense physical activity.
6. Start Recording
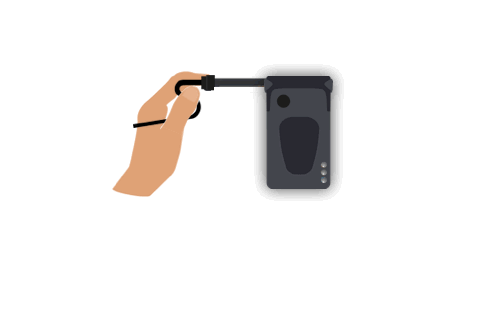
Connect your Hexoskin Device to the Shirt Connector. Please note that your Hexoskin Device will start recording automatically as soon as you plug it into the Shirt Connector. The recording LED (the middle orange LED) will stay on for the duration of the recording. This will mark the beginning of your record. Put the Hexoskin Device horizontally into the Side Pocket with the wire pointing upward and the light facing away from the body.